A window air conditioner, sometimes known as a through the wall air conditioner, is a great option in cases where there is no central air conditioning unit or for an older home without ducts. These instructions will show you how to install an air conditioner wall unit through a vertical opening window (double hung). For instructions installing an in wall air conditioner through a horizontal sliding window, you will need to consider a casement window air conditioner. For installation instructions for these types of units, please visit our article Casement Window Air Conditioner Installation. You could still make normal air conditioner window unit work in a casement window, but it will require more effort.
How to Install a Window Air Conditioner

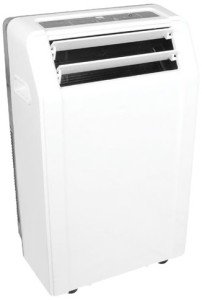
Window Air Conditioner
-
Determine which window will hold the unit. The electrical power chord should reach the outlet you will use. The outlet needs to provide the required electrical output for your unit (refer to your owner’s manual for this). Inspect the window to be sure there is nothing loose or rotten, particularly if it is a wooden window. Remove any screens that may be present.
-
You will notice that there is a groove on the bottom of the air conditioner made for the window sill. Lift the window open and, with the help of a friend, lift the in wall air conditioner onto the opening of the window, making sure the unit falls into the window sill on the groove. You can attempt to lift the unit on your own if you feel you can do this by yourself. However, since safety is the most important thing when installing the wall unit air conditioner, we encourage you to take the safest course possible.
-
Tilt the unit toward you and then close the window so that it catches the lip at the top of the unit. Gently back up the unit until the window catches the top lip of the air conditioner. Once the window is holding the unit, it is time to secure the movable part of the window. We suggest using an adapter like this one that will hold the window in place so that it doesn’t open. If the unit is to be permanent, you can insulate the top and bottom with window foam or another form of insulation.
-
Then, can extend the plastic side screens of the unit to reach to the side window sills to close the openings on either side of the air conditioner. To hold them in place, there are perforated holes for nails or screws at the top and bottom of each screen. If you don’t want to damage the window, you may want to just nail down the bottom hole. Another option is to use artist tape or some other tape to hold the side screens in place.
-
At this point, you are done! Plug in the unit to he outlet and turn it on.
The are additional steps you can take to improve insulation and the effect of the air conditioner window unit. You could insulate the sides with foam backing. You could use window foam or spray foam to fill in any openings that you may see. If you are installing the unit in a downstairs room, you may want to reinforce the plastic side screens with either plywood or another strong material if you are concerned about someone breaking into the home.